Areas

You can travel to different Areas to blow different kinds of leaves. Unlock Areas must first be purchased in the Coins shop for ![]() 20, and then each individual area must be unlocked under Areas.
20, and then each individual area must be unlocked under Areas.
Fruits and Seeds can spawn in other areas outside of those where their leaves can be found.
At the bottom of the areas menu there are buttons to switch between galaxies if unlocked. To add a location to the Favorites list, click on the icon next to the area.
Leaf Galaxy
For enemy spawn locations, see Enemies and Bosses.
| Area | Description | Unlock Requirement | Type of leaves | Materials |
|---|---|---|---|---|
| Home Garden | This is your home garden. Your partner likes to have the garden CLEAN OF LEAVES AT ALL TIMES. | Free (starting area) | ||
| Neighbors' Garden | This is your neighbors' garden. They wonder why there are so many leaves around recently. | Free | ||
| Mountain | Everyone at the mountain is annoyed by leaves. GET RID OF THEM. | |||
| Space | No one knows how this works, but leaves can apparently spawn in space. | |||
| THE VOID | Rare leaves spawn in THE VOID. | |||
| The Abyss | Some leaf blowers were never seen again after descending into The Abyss. | |||
| The Celestial Plane | Ascend to The Celestial Plane to acquire Celestial Leaves. | |||
| The Mythical Garden | A wise person once stepped into the Mythical Garden but they were never the same... | |||
| The Volcano (!) | It's kind of hot in here. | |||
| The Abandoned Research Station | This is an abandoned research station in the Antarctica. Make sure to bring some hot beverages with you! | |||
| The Hidden Sea (!) | A vast sea that has been hidden for eons. | Own The Abandoned Research Station |
||
| Leafsink Harbor | Located in the northern hemisphere, Leafsink Harbor is home to many wealthy leaf blowers due to its valuable resources. | |||
| Ascend to the Leaf Tower as there is someone waiting for you at its peak... | None | |||
| The Moon | Dust, dust, more dust, and... Leaves? ON THE MOON? | |||
| The Infernal Desert (!) | Sand, sand, more sand, scorpions, cacti, pure heat... What a lovely place! | |||
| This place seems to be cursed. | None | None | ||
| None | Unlock levels at The Cursed Pyramid | None | ||
| Kokkaupunki | A small historical town built on top of a hill with a pleasant atmosphere. The residents love to exchange materials. | None | None | |
| The lovely town of Kokkaupunki has been cursed. The curse must be lifted... | None | |||
| The Dark Glade | A small, dark place in an eternal forest with a mysterious red glade. | None | ALL [1] | |
| Black Leaf Hole | A black sphere where Leaves travel as fast as light near its event horizon. Sounds scary. | None | None | |
| Dicey Meadows | Nature's randomness reigns supreme, and every step might just lead you to a fresh roll of luck. |
|
None | |
| Glinting Thicket | Nestled deep within the glinting forest, this place is the jackpot of foliage fanciness. | None | ||
| The Cheese Pub | A famous tavern located in Leafsink Harbor. | None | None | |
| Literally unlocks your house for you have lost the keys since the start of your journey. | None | None |
- ↑ The Dark Glade: All spawnable materials can be found here, but their spawn chances are decreased.
Sacred Nebula
To unlock the Sacred Nebula, you must enter the Black Leaf Hole and pay ![]() 250 Shards.
250 Shards.
| Area | Description | Unlock Requirement | Type of leaves | Boss |
|---|---|---|---|---|
| Biotite Forest | A calm place where diverse leaves spawn. | Free (starting area) | ||
| The Exalted Bridge | A literal rainbow bridge that leads to a protected place. | Free (starting area) | ||
| The Ancient Sanctum | Protected by Zyrkiras, the Centaur, this place is older than the actual universe. It happens to be the birthplace of Leaf Relics. | Defeat Centaur | ||
| Vilewood Cemetery | An abandoned cemetery. There's something else buried here... | |||
| The Lone Tree | A silent place with an everlasting tree, guarded by a mysterious presence. | Defeat Vile Creature
|
||
| Spark Range | The Spark Range is an electrifying place where lightning strikes every second. | Defeat Air Elemental
|
||
| Spark Bubble | The Spark Bubble consists of nothing but pure electricity. | Defeat Air Elemental
|
||
| Spark Portal | After defeating the Spark Bubble, the emitted energy formed an electrifying portal. | Defeat Spark Bubble |
Energy Belt
To unlock the Energy Belt, you must enter the Spark Portal and pay ![]() /
/![]() /
/![]() 500,
500, ![]() 10k (1e4), and
10k (1e4), and ![]() 50k (5e4).
50k (5e4).
| Area | Description | Unlock Requirement | Type of leaves | Boss |
|---|---|---|---|---|
| Energy Shrine | A peculiar place with a shrine that used to emit vast amounts of energy. | Free (starting area) | ||
| Plasma Forest | High-energy area. Feels like you'll get an electric shock each second. Bzzz bzzz. | Free (starting area) | ||
| Blue Planet Edge | The Blue Energy Stone can be found here. | Free (starting area) | ||
| Green Planet Edge | The Green Energy Stone can be found here. | Free (starting area) | ||
| Red Planet Edge | The Red Energy Stone can be found here. | Free (starting area) | ||
| Purple Planet Edge | The Purple Energy Stone can be found here. | Free (starting area) | ||
| Black Planet Edge | The Energy Shrine has awakened the Black Planet along with a powerful creature... | Defeat the Terrors | ||
| Terror Graveyard[1] | A graveyard filled with ancient tombs, as well as strange, twisted trees, gnarled roots, and thick vines. A magic book floats here. | Defeat Super-Terror | ||
| Energy Singularity | An infinitely small point in the space-time fabric which contains more than 99.99% of energy in the universe. A strong entity guards this place. | Defeat Super-Terror | ||
| Fire Fields Portal | The Fire Fields Portal opened after defeating the Energy Guard. | Defeat Energy Guard |
- ↑ Unlocking the Death Book requires:
 100k (1e5), 300 Ascension Juices,
  500,
500,  500,
500,  100,
100,  10
10
Fire Fields
To unlock the Fire Fields, you must enter the Fire Fields Portal and pay ![]() 100,
100, ![]() 10, and
10, and ![]() 5k (5e3) .
5k (5e3) .
| Area | Description | Unlock Requirement | Type of leaves | Boss |
|---|---|---|---|---|
| The Shadow Cavern | A dark, narrow cavern below a huge fire river. | Free (starting area) | ||
| The Coal Mine | Where the earth burns and miners sweat, hacking at veins of black gold. | Unlock Mines from the |
||
| Mount Moltenfurty (!) | Mount Moltenfury is a large erupting volcano in the Fire Fields region. It is the largest volcano in the Fire Fields and is a popular destination for hikers. Heat resistance gear is recommended. | Free (starting area) | ||
| The Fire Temple (!) | The Fire Temple lies inside of a large volcano. A power chimera guards its entrance. Its flame is the source of the temple's power. | |||
| Flame Brazier (!) | An everlasting flame lights up the Flame Brazier since the birth of the Fire Universe. The Green Flame heats up all atoms to near lightspeed. Just a single second being near the Green Flame could be enough to set an entire universe on fire. | Borb Prison Solved | ||
| Fire Universe (!) | The Fire Universe is home to a magic chimera named Spectralseeker. Long after it was captured by Borbiana Jones, the chimera fused itself with the Green Flame - an everlasting flame since the birth of the universe - in order to prevent its demise. This mindblowing, mystical reunion worked, and Spectralseeker was brought back to life. | Defeat |
||
| Soul Portal | The Soul Portal opened after defeating Spectralseeker. | Defeat |
Soul Realm
To unlock the Soul Realm, you must enter the Soul Portal and pay 25 ![]() Soul Stones, 20
Soul Stones, 20 ![]() Strange Essence, and 2
Strange Essence, and 2 ![]() Iridescent Essence.
Iridescent Essence.
| Area | Description | Unlock Requirement | Type of leaves | Boss |
|---|---|---|---|---|
| Soul Temple | A magical place with a mystical vibe. Its walls are lined with ancient runes and symbols. | Free (starting area) | ||
| Soul Crypt (!) | A bright but dangerous and scary dungeon. It's a great place to explore, though. | Free (starting area) | ||
| The Hollow (!) | A dark and dismal where a fearsome boss resides. This place is strictly off limits to anyone but the most determined blowers. Adventurers who came here were never to be seen again. | Beat Floor 20 of the Soul Crypt | ||
| Soul Forge | A mysterious area; no one knew exactly what it was or what went on behind its walls. Rumors swirled of souls being forged and remade - and the occasional screams echoing in the night only added to the mystery. | Defeat |
||
| The Fabric of the Leafverse (!) | A stalwart warden protects this place. They keep a vigilant eye on all that takes place within this little-known part of the universe and make sure that the balance of leaves is maintained, that everything remains as it should. | Beat Floor 100 of the Soul Crypt | ||
| Quark Portal | A portal leading to the Quark Ambit. | Defeat |
||
| Primordial Ethos | A convergence of swirling nebulas and radiant star clusters, serving as a crossroads for interstellar energy currents. | Beat Floor 100 of the Soul Crypt |
Quark Ambit
To unlock the Quark Ambit, you must first defeat Soul Mirage, then enter the Quark Portal.
| Area | Description | Unlock Requirement | Type of leaves | Boss |
|---|---|---|---|---|
| Quark Nexus | Find yourself within a transcendent space where quarks and quasars unite, shaping a biome that extends from the subatomic to the cosmic. | Free (starting area) | ||
| Quantum Aether | Step into a sanctuary nestled within the uncharted territory of the quantum realm, where space-time itself dances with the tiniest building blocks of existence. | Free (starting area) | ||
| Astral Oasis | An area with almost infinite reflections, where every droplet of cosmic water mirrors the grandeur of the universe, creating an awe-inspiring sight. The sight gets disturbed occassionally, though. | Free (starting area) | ||
| Dimensional Tapestry | Dimensions are woven together, creating a cosmic mosaic that captivates with its grandeur. | Defeat |
||
| Planck Scope | Within the Planck Scope, time and space dance in an eternal flux, with particles blinking in and out of existence in a breathtaking display of cosmic transience. | Defeat |
||
| Ante Leafton | The dooryard to The Leafton Pit. | Defeat |
||
| The Leafton Pit | A cavernous expanse of pure energy, where hordes of enemies come to eliminate intruders. |
Event
The Event areas can are only available on certain dates, or alternatively can also be available using respective Artifacts. See more here.
| Area | Description | Unlock Cost | Type of leaves | Boss |
|---|---|---|---|---|
| Cursed Halloween | It's Halloween. The Cursed Cheese returns! | Use the |
||
| Farm Field | Grow your own plants here. Make sure to water them regularly! | Use the |
||
| Butterfly Field | The perfect place to breed butterflies. | Use the |
||
| Vial of Life | The Vial of Life spreads flower seeds occasionally. Collect them to plant new flowers! | Use the |
||
| The Doomed Tree | It's Nature Season. The Doomed Tree returns! | Use the |
Dangerous Areas (!)
Areas marked with (!) deal damage to the player due to an inhospitable environment. Without upgrades, this can destroy ![]() Player HP.
Player HP.
| Area | Base Damage |
|---|---|
| The Volcano | 3 |
| The Hidden Sea | 50 |
| The Infernal Desert | 20000 |
| The Leaf Tower | Scales with floor |
| The Cursed Pyramid | Scales with floor |
| Mount Moltenfury | 2% of Max HP |
| The Fire Temple | 30% of Max HP |
| Flame Brazier | 60% of Max HP |
| The Fire Universe | 80% of Max HP |
| Soul Crypt | 200% of Max HP. Scales with floor |
| The Hollow | 300% of Max HP |
| The Fabric of the Leafverse | 350% of Max HP |
The Volcano and The Hidden Sea can easily be cleared with the use of the Leaf Shield upgrade in all Flask shops. The Infernal Desert requires high regeneration such as from Medkits in order to stay for long.
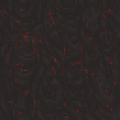
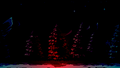
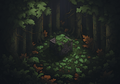
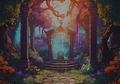
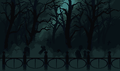
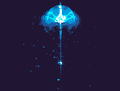
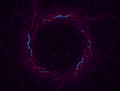
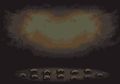
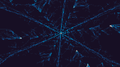
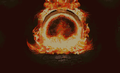
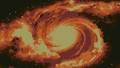
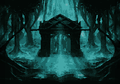
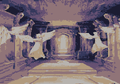
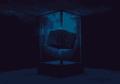
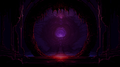
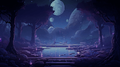
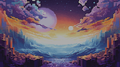
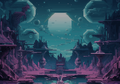
Backgrounds
Each area has a different background, usually hinting at the area's leaves/bosses.

Neighbors' Garden (Tile)

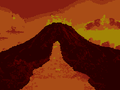
Mountain

Space

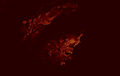
THE VOID

The Abyss (Tile)

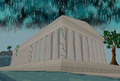
The Celestial Plane

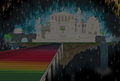
The Mythical Garden
The Volacno (Tile)

The Abandoned Research Station
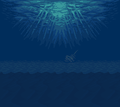
The Hidden Sea
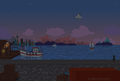
Leafsink Harbor

The Leaf Tower
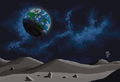
The Moon
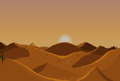
The Infernal Desert
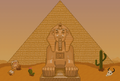
The Cursed Pyramid

The Inner Cursed Pyramid (Tile)
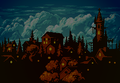
Kokkapunki
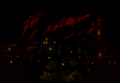
Cursed Kokkapunki
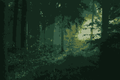
The Dark Glade
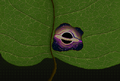
Black Leaf Hole
Dicey Meadows
Glinting Thicket
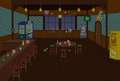
The Cheese Pub

Your House (Tile)
Biotite Forest
The Exalted Bridge
The Ancient Sanctum
Vilewood Cemetery
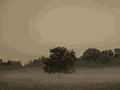
The Lone Tree
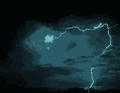
Spark Range
Spark Bubble
Spark Portal

Energy Shrine

Plasma Forest

Planet Edge
Terror Graveyard
Energy Singularity
Fire Fields Portal
The Shadow Cavern
Mount Moltenfury
The Fire Temple
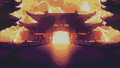
Flame Brazier
The Fire Universe

Soul Portal
Soul Temple
Soul Crypt

The Hollow

Soul Forge
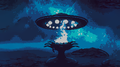
The Fabric of the Leafverse
Quark Portal

Quark Nexus

Quantum Aether
Astral Oasis
Dimensional Tapestry
Planck Scope


| Leaf Blower Revolution Wiki | ||
|---|---|---|
| Blowing | ||
| Areas | ||
| Mechanisms | ||
| Resets | ||
| Drops | ||
| Other Resources | ||
| Rewards | ||
| Stats | ||
| General | ||
- Areas